Digitizing old film can be a hassle if you don’t have the right gear. The Kodak Scanza gives you a pretty direct way to turn all sorts of developed film and slides into JPEGs—no need to wrestle with a flatbed scanner. It snaps images with an internal camera, so you can archive memories a lot faster if you’re not after ultra-fine detail.
- FILM TO JPEG IN SECONDS – Powerful 14/22MP KODAK Film Scanner Converts Old 35mm, 126, 110, Super 8 & 8mm Negatives & Slides to JPEG Digital Files - NOTE; THE SCANZA WILL NOT CONVERT FILMS OTHER THEN 35mm, 126, 110, Super 8 & 8mm Negatives
- LARGE, BRIGHT 3.5” TFT LCD – High Definition Built-In Color Display Features Adjustable Brightness & Convenient Tilt for Easy Operation & Image Viewing
- AN ADAPTER FOR EVERYTHING – Unit Arrives w/Multiple Film Inserts & Adapters for Fast, Flexible Operation; Big One-Touch Buttons Allow for One-Step Scan & Save

You get a 3.5-inch LCD for previewing and some basic tweaks, plus adapters for several film formats. The scan quality is decent for everyday use, but don’t expect miracles—this isn’t a pro-level scanner. One thing to remember: it only works with developed film, and Super 8 gets converted to stills, not video.
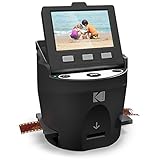
Overview of the Kodak SCANZA Digital Film & Slide Scanner
This little scanner is built for quickly converting developed film and slides to JPEGs, skipping the fuss of flatbed setups. There’s a 14MP camera sensor inside (with optional interpolation up to 22MP) that snaps stills from 35mm, 126, 110, Super 8, and 8mm film.
The 3.5-inch LCD lets you preview, adjust brightness, and make small edits before saving. It tilts, and the controls are straightforward, though honestly, the interface feels a bit old-school compared to modern gadgets.
Adapters and inserts keep the film lined up, but you can’t scan undeveloped film or get video from Super 8. The quality is fine for casual archiving, but if you’re after razor-sharp detail, you’ll probably want something more robust.
Pros: Fast operation, supports lots of film types
Cons: Only works with developed film, doesn’t match pro scanners
Effortless Film and Slide Conversion
Moving from physical film to digital is pretty painless here. The numbered inserts and trays make it easy to keep track of different film types, so swapping formats isn’t a chore.
The LCD gives a decent preview for framing and checking images before you hit save. You can adjust color and brightness right there, which means less time fixing things up later.
Still, if you’re picky about image quality, you might notice it’s not quite on par with high-end flatbeds. Some folks find the colors a little muted, so you might want to tweak them afterward.
Pros:
- Quick format changes
- Handy on-device preview and editing
Cons:
- Not as sharp as pro scanners
- Colors sometimes need extra correction
Large 3.5” LCD Screen Experience
The built-in LCD makes it simple to preview your scans in real time, which is great for checking framing and color.
It’s bright enough for most indoor setups, but if you’re working right by a sunny window, you might wish it was a bit stronger. Some people are happy with the size; others wish for something bigger to really see the details.
Pros:
- Decent previews without a computer
- Easy on-screen controls
Cons:
- Not ideal for inspecting tiny details
- Can be tough to see under harsh light
Versatile Film Compatibility and Adapters
If you’ve got a mixed bag of old film, this scanner’s pretty accommodating. It handles developed 35mm, 126, 110, Super 8, and 8mm, though undeveloped stuff is a no-go. Super 8 comes out as stills only.
Adapters and trays are clearly labeled, which helps avoid mistakes and speeds things up.
Pros:
- Works with several film types out of the box
- Numbered adapters make it easy to match film to tray
Cons:
- Limited to supported formats—no scanning prints or undeveloped film
- Adapter trays can be a tight fit for oddball sizes
If you’ve got a variety of film, these adapters keep things simple.
User-Friendly Interface and Controls
The controls are pretty straightforward—clearly labeled buttons and simple prompts on the screen. The LCD tilts and lets you adjust brightness, which is handy for getting a better look at your scans.
Numbered inserts and trays help you set up without much trial and error. You can tweak RGB and resolution right from the device, so you’re not stuck installing extra software.
Pros:
- Bright, adjustable display
- Buttons and menus are easy to figure out
Potential Drawbacks:
- Menus are basic—don’t expect a ton of customization
- You’ll want to get familiar with the adapters for the quickest results
Image Quality and Resolution Options
The 14MP sensor inside delivers clear digital images that’ll work for most archiving and sharing. If you need bigger files, you can bump up to 22MP with interpolation, but don’t expect extra real-world detail.
Colors are usually on point, but there’s sometimes a slight softness or muted look, especially compared to pricier scanners. Again, it only handles developed film.
Pros:
- Fast conversion with decent clarity
- Adjustable resolution for flexibility
Cons:
- Interpolated images don’t really add detail
- Some color fade, especially on older film
Included Accessories and Setup
Right out of the box, you get a set of adapters and inserts for 35mm, 126, 110, Super 8, and 8mm—no need to buy extras just to get started.
Also tossed in: a USB power cable, HDMI cable, AC adapter, video cable, and a film cleaning brush. The brush is handy for knocking dust off your film and the light box so you don’t end up with random spots in your scans.
Setup’s pretty much plug-and-play. Labeled trays and big buttons make it easy, but you’ll need to bring your own SD card—there isn’t one in the box.
Pros
Quick and Simple Scanning Process
This thing makes turning film and slides into digital files a breeze. Most people find loading film into the right adapter is straightforward, and scanning only takes a few seconds per image.
- Minimal setup time
- One-touch buttons keep it simple
Great for tackling big boxes of old slides without spending all weekend.
Supports Multiple Film Formats
You can scan a bunch of film types—35mm, 126, 110, Super 8, and 8mm—so you’re not stuck with one device per format.
Supported formats:
| Film Type | Supported |
|---|---|
| 35mm | ✔ |
| 126 | ✔ |
| 110 | ✔ |
| Super 8 | ✔ |
| 8mm | ✔ |
If you’ve got a mix of formats, it’s nice not having to switch devices.
Intuitive Controls and Navigation
Menus are clear, and you can get to color, resolution, and image review without hunting through settings.
Highlights:
- Easy menu layout
- Helpful on-screen prompts
- You can flip through saved images right on the scanner
You won’t need a manual to get started.
Bright and Adjustable LCD Display
The LCD is bright and adjustable, plus it tilts for a better view.
Perks:
- Good visibility for checking scans
- Brightness tweaks help in different lighting
- Tilt screen cuts down on glare
It’s just easier to see what you’re doing before you save.
Cons
Not Suitable for Raw or Undeveloped Film
You can’t scan raw, undeveloped negatives or reels here.
It’s only for developed film, so if you’ve got unprocessed rolls, you’ll need to get them developed first.
Trying to scan straight from the camera? Nope, not with this model.
Image Quality Below Professional Scanners
Scans are fine for sharing or casual viewing, but they’re just not as sharp or color-accurate as what you’d get from a pro scanner.
Some people notice slightly washed-out colors, even after making tweaks.
If you’re archiving for the long haul or want to restore every detail, this probably isn’t the tool for you.
How it stacks up:
| Feature | This Model | Pro-Level Scanners |
|---|---|---|
| Color Accuracy | Adequate | High precision |
| Sharpness | Good for casual use | Exceptional |
| Editing Control | Basic | Advanced |
SD Card Not Included
You’ll need an SD card to save images, but there isn’t one in the box.
It’s a small extra purchase, but a little annoying if you don’t have a spare card lying around.
Tip: Double-check SD card compatibility before buying.
Limited Editing Features
Editing options are barebones—just basic brightness, color, and rotation.
If you want more control (like dust removal or sharpening), you’ll need to do it on your computer.
Not ideal if you want perfect scans straight out of the device.
Customer Reviews
A lot of buyers mention it’s easy to set up and get scanning, and the film/slide loading is pretty foolproof. People like that it’s quick for digitizing big collections.
Image quality feedback is a bit mixed. Some get clear results after minor color tweaks, while others say some scans look a bit washed out, even after fiddling with settings.
What comes up most:
- Fast, simple operation
- Good for bulk digitizing
- Handy built-in screen
Gripes:
- Color accuracy isn’t always spot-on
- No SD card in some bundles
Most folks are happy with the trade-off between convenience and quality for personal archiving, but pros will probably want more.
Tips for Best Results
Using the Cleaning Brush Effectively
Dust can really mess with your scans, so use the included brush to clean both the film and the scanner’s light box.
Some quick advice:
- Clean before each batch—it’s worth it
- Be gentle to avoid scratching old film
- Don’t forget the light box, since even tiny specks show up
Keeping things clean means less time fixing images after the fact.
Optimizing Image Settings
You can tweak RGB and resolution, which helps get the colors and details right. Just don’t go overboard—too much fiddling can make things look weird.
A few things to keep in mind:
| Setting | When to Adjust | Potential Drawback |
|---|---|---|
| RGB Color Balance | To fix color shifts in old film | Too much can mess up tones |
| Brightness | For underexposed images | Overdoing it can blow out highlights |
| Resolution | For bigger prints or cropping | Higher settings = bigger files |
Small, careful adjustments work best. Check changes on the display before you save.
With a little cleaning and some thoughtful setting tweaks, you’ll get solid scans without a ton of rework.
Frequently Asked Questions
What types of film and slides can the Kodak SCANZA scanner digitize?
The SCANZA handles a handful of the usual suspects: 35mm, 126, and 110 film, plus Super 8 and 8mm film frames. It won’t work with undeveloped film, prints, or anything outside that list, so double-check your stash before buying.
How does the image quality of the Kodak SCANZA compare to professional scanning services?
With its 14MP sensor (and a bump up to 22MP via interpolation), the SCANZA produces scans that are fine for sharing or basic archiving. But let’s be honest—if you’re hoping for the crispness and color fidelity of a pro flatbed or drum scan, you’ll probably notice a difference.
What file formats can the Kodak SCANZA save scans as?
Everything comes out as a JPEG. It’s super easy to share and works just about anywhere, but if you’re a stickler for uncompressed archival files, you might wish there were more options.
Is the Kodak SCANZA compatible with both Mac and Windows operating systems?
Yep, it plays nice with both Mac and Windows. You can connect via USB, or just pop out the SD card and transfer your JPEGs however you like.
How user-friendly is the Kodak SCANZA for those unfamiliar with scanning technology?
It’s pretty approachable. The buttons are labeled, there’s a 3.5-inch LCD for previewing, and setup isn’t a headache. That said, dialing in the colors might take a bit of fiddling, especially if you’re picky.
What accessories are included with the Kodak SCANZA scanner?
Inside the box, you’ll find several film inserts and adapter trays for the formats it supports, plus a USB power cable, HDMI cable, AC adapter, video cable, and a little cleaning brush for the light box. Just a heads up—there’s no SD card in there, so you’ll need to grab one on your own.


